How to set up Microsoft Mail for Professional and Pro Plus Email Hosting accounts
This article demonstrates how to set up the Microsoft Mail e-mail client application to access a Professional or Pro Plus Email Hosting account.
Table of Contents
Setting up Microsoft Mail
To configure Microsoft Mail to work with your e-mail account, follow these steps:
- Start Mail.
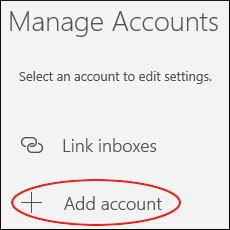
- Click Accounts, and then in the Manage Accounts sidebar, click Add account:
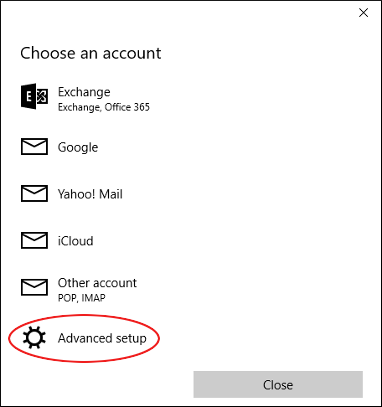
In the Choose an account dialog box, scroll down, and then click Advanced setup:
In the Advanced setup dialog box, click Internet email:

In the Internet email account dialog box, in the Account name text box, type a descriptive name for the account. The name can be anything you want:
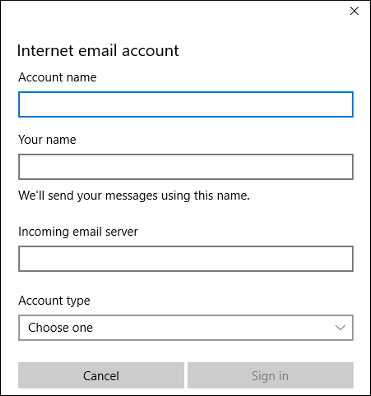
- In the Your name text box, type the name you want to appear on messages you send.
- In the Incoming email server text box, type imap.titan.email.
- In the Account type list box, select IMAP4.
- In the Email address text box, type the full e-mail address of the Professional or Pro Plus Email Hosting account you created.
- In the User name text box, type the full e-mail address of the Professional or Pro Plus Email Hosting account you created.
- In the Password text box, type the password for the e-mail account.
- In the Outgoing (SMTP) email server text box, type smtp.titan.email.
Confirm that all of the following check boxes are selected:
- Outgoing server requires authentication
- Use the same user name and password for sending email
- Require SSL for incoming email
- Require SSL for outgoing email
- Click . When Mail finishes configuring the account, the All done! Your account was set up successfully message appears.
Click , and then click the refresh icon:

Mail downloads the messages in the account.
Article Details
- Product: Email Hosting
Grow Your Web Business
Subscribe to receive weekly cutting edge tips, strategies, and news you need to grow your web business.
No charge. Unsubscribe anytime.
Did you find this article helpful? Then you'll love our support. Experience the A2 Hosting difference today and get a pre-secured, pre-optimized website. Check out our web hosting plans today.